Shooting Note
Human Vision vs. Photography
A Philosophical Inquiry into the Act of Seeing, Beyond Technique
0. The Question Began with a Small Experiment
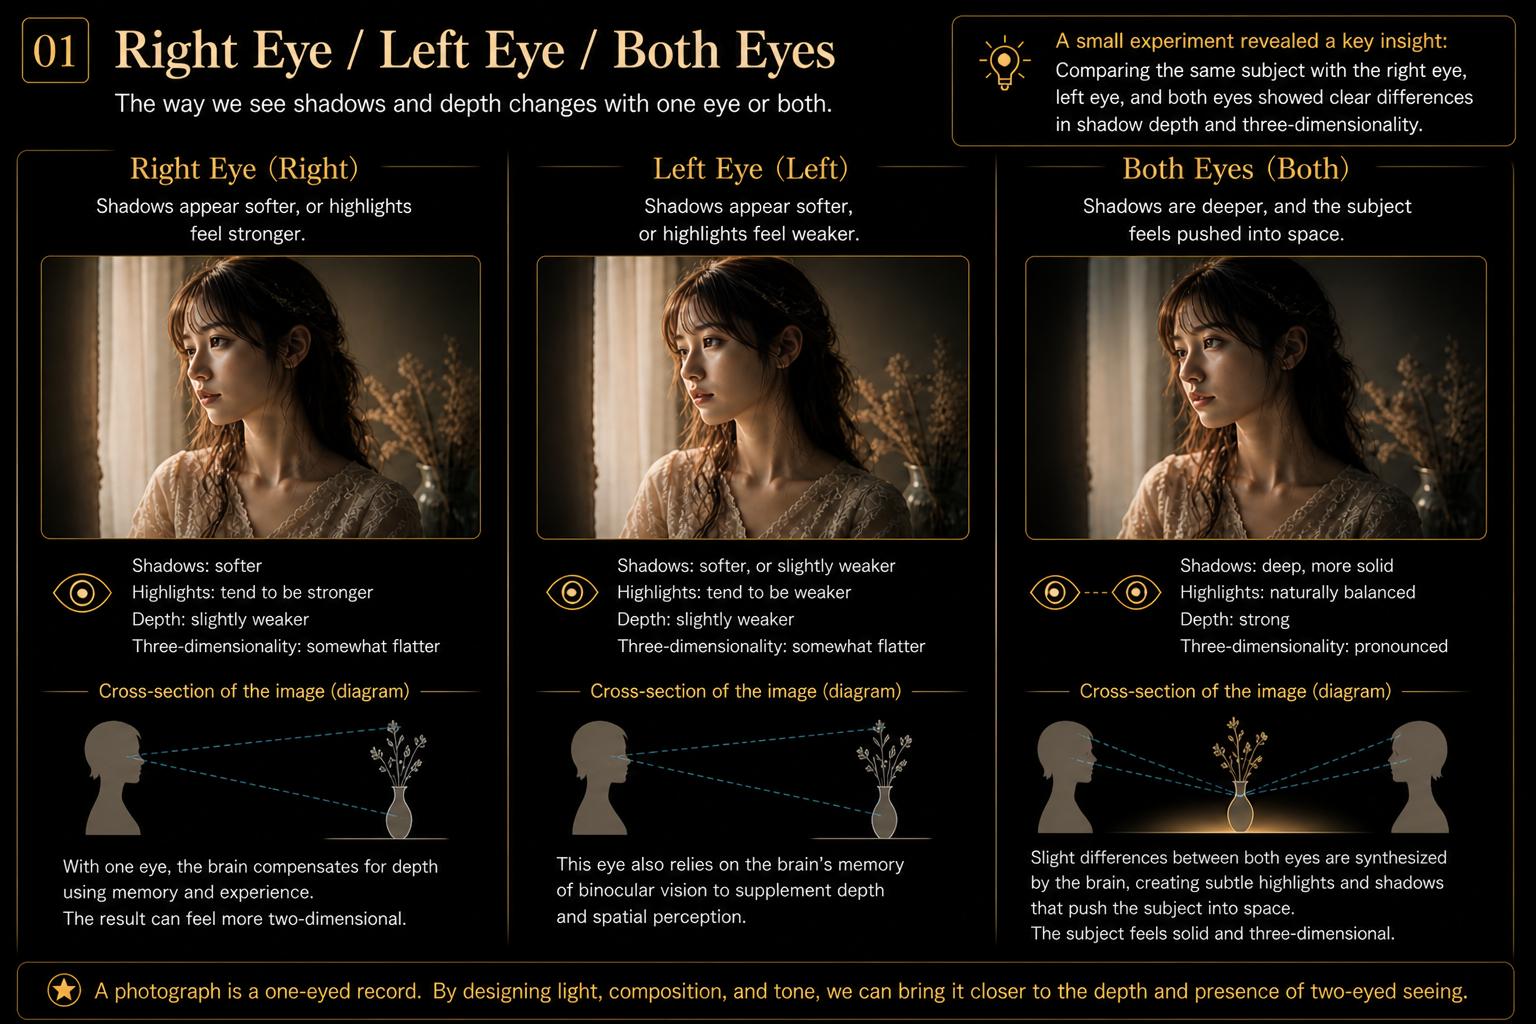
One afternoon, I turned my room into a temporary lab.
Placing a subject at the center, I sketched what I saw—first with my right eye, then my left, and finally with both eyes open.
This revealed some surprising differences:
- With one eye, shadows appeared softer, or sometimes highlights became unnaturally pronounced. Or, in certain conditions, the reverse seemed to happen.
- With both eyes, the shadows deepened dramatically. The subject felt three-dimensional—as if it were displacing the air around it.
And yet, even with one eye, the scene never appeared entirely flat.
It seems the brain supplements depth using memory and past experience gained from binocular vision.
From this experience, a hypothesis emerged.
Perhaps the “stiffness” or “unnaturalness” often sensed in photos—what we call “photographic” or “lacking life”—comes from the difference between the camera’s monocular view and our natural binocular vision.
If we can clearly identify this dissonance, we might uncover hints for creating more natural, emotionally resonant photographs.
That is the intent behind this note.
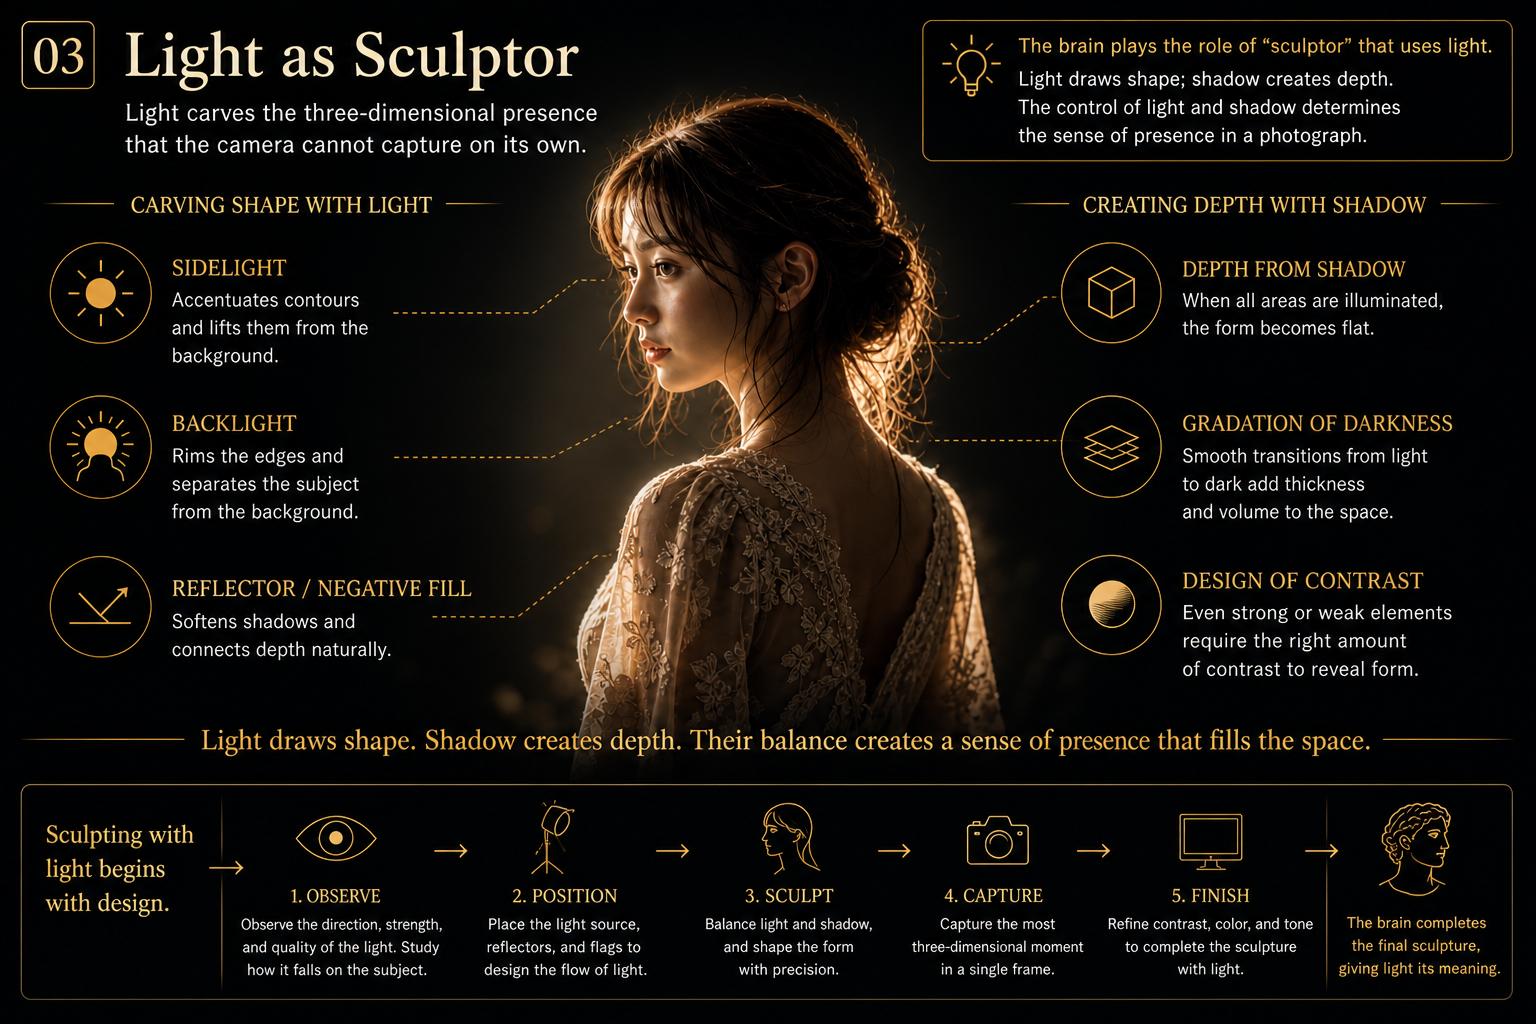
1. The Magic of Binocular Edge Perception
Our brains synthesize the slight disparity between each eye’s view in real time, adding delicate highlights and shadows to the edges of objects.
It’s as if light itself were sculpting the form.
But the camera is monocular.
So I use light as a stand-in for the brain’s sculptor.
For example:
- Use side or backlighting to give natural depth to contours.
- Create front-to-back gradients with shallow depth of field.
- Slightly raise contrast during post-processing to enhance edge vitality.
In doing so, I attempt to let light and editing momentarily take over the work of our “internal sculptor.”
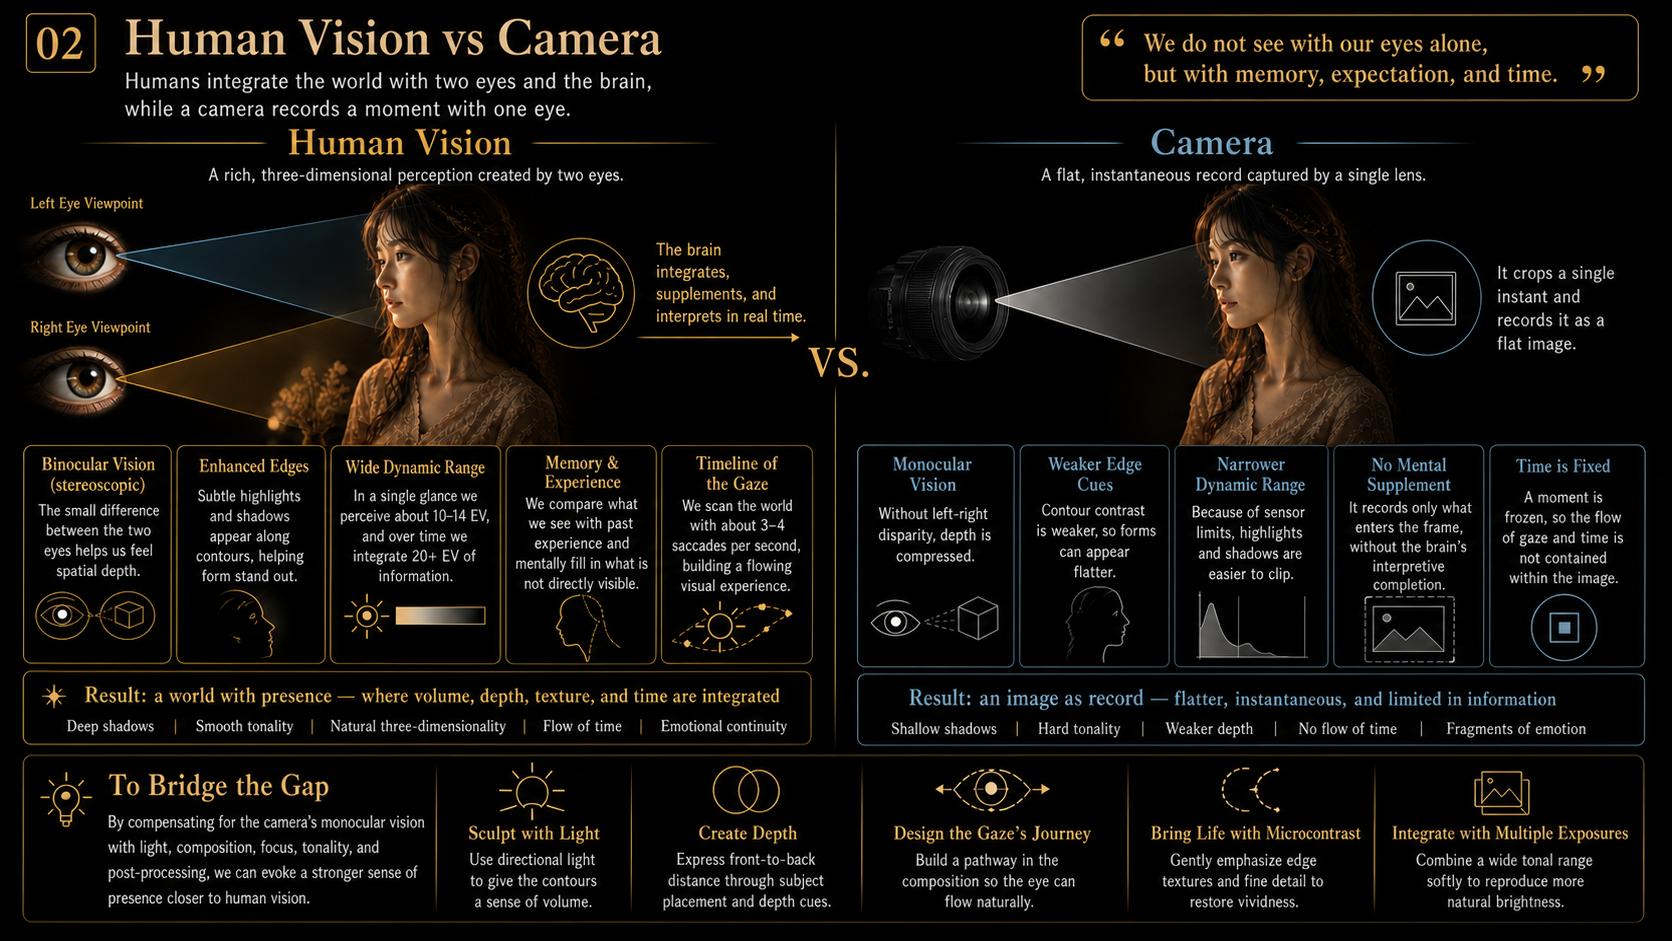
2. The Eye’s “Ninja Mode” — Instantly Adapting to a Wide Dynamic Range
The human eye can instantly adapt to changes in brightness, capturing 10–14 EV in a single glance.
Given time, we can integrate over 20 EV of information.
In contrast, camera sensors are far less adaptable.
This often leads to crushed shadows or blown-out highlights—one of photography’s recurring challenges.
Possible compensations include:
- Expose for the highlights and recover shadows via RAW.
- Use soft graduated filters to mimic the eye’s auto-compensation.
- Merge multiple exposures for HDR, though this can easily become unnatural. Use with restraint, and refine carefully with modern tools when needed.
Through these techniques, we can grant our cameras a touch of that ninja-like adaptability.
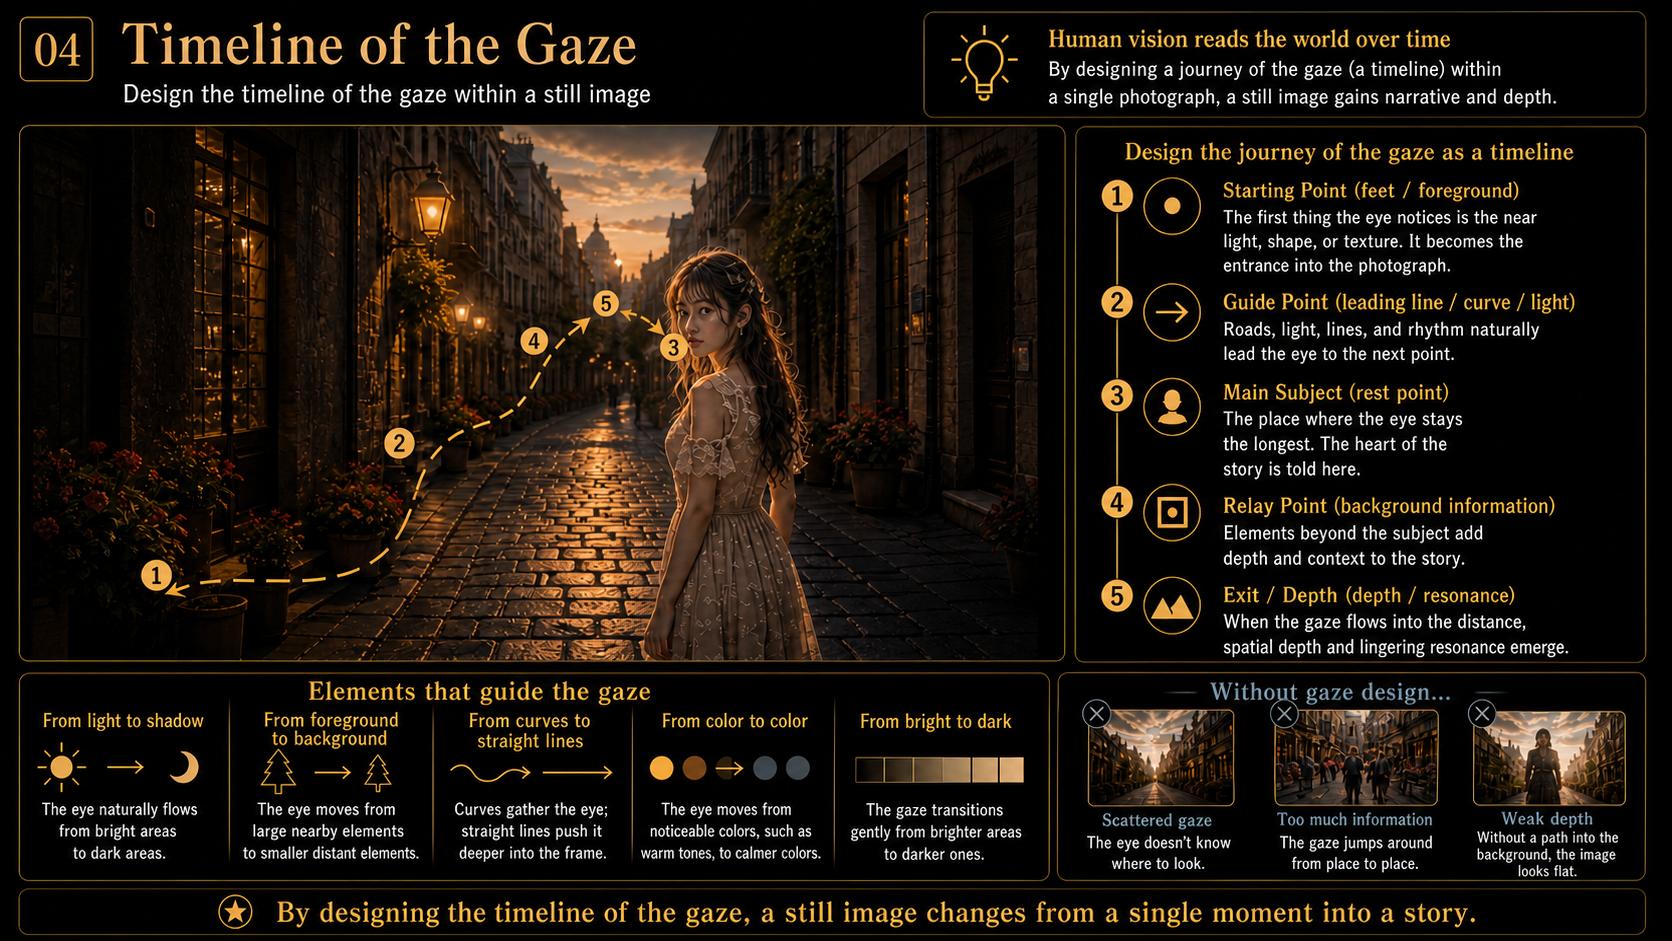
3. The Timeline of the Gaze
Photographs may appear “flat” because we don’t experience vision in stillness.
We constantly scan the world—around 3–4 saccades per second—creating a visual “flow” that the brain integrates into lived experience.
So I began to wonder: can we encode time within a still image?
- Arrange light and shadow rhythmically to lead the gaze through the frame.
- Link visual elements from front to back, light to dark, angular to curved.
This may be one of the most fundamental principles of composition.
When such structure is present, the image begins to tell a story—a moment when narrative is born within a still frame.
A timeline drawn by the eye.
Which leads us to the question of spatial resolution.
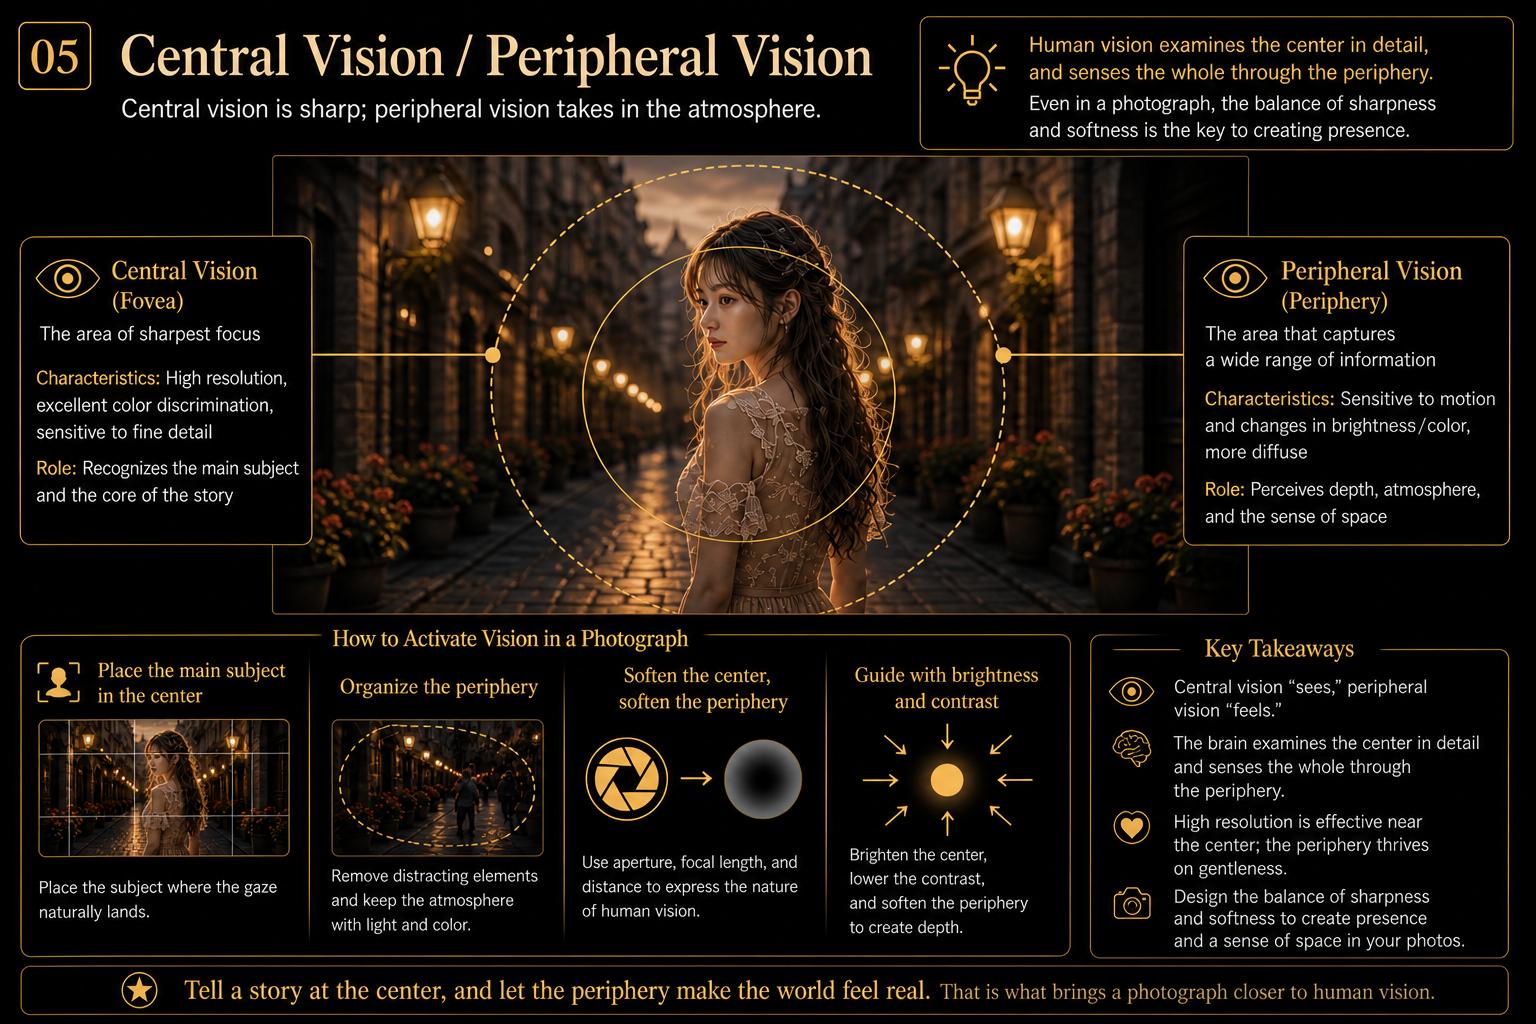
4. Pixels and the Retina — Why High Resolution ≠ Human Vision
Our central vision is sharp, but our peripheral view captures only vague impressions.
The brain stitches these fragments into what we perceive as a coherent “world.”
So, simply increasing sensor resolution doesn’t make an image closer to human vision.
Better approaches may include:
- Soften the periphery slightly.
- Reserve fine detail for where you want the eye to land.
Such lens design and processing may feel more natural to human memory and perception.
And since photography captures only a fleeting moment, we must ask—will it emphasize that moment’s impact, or reflect a flow of time within it?
Smartphones, monitors, gallery prints—each output medium may call for a different approach.
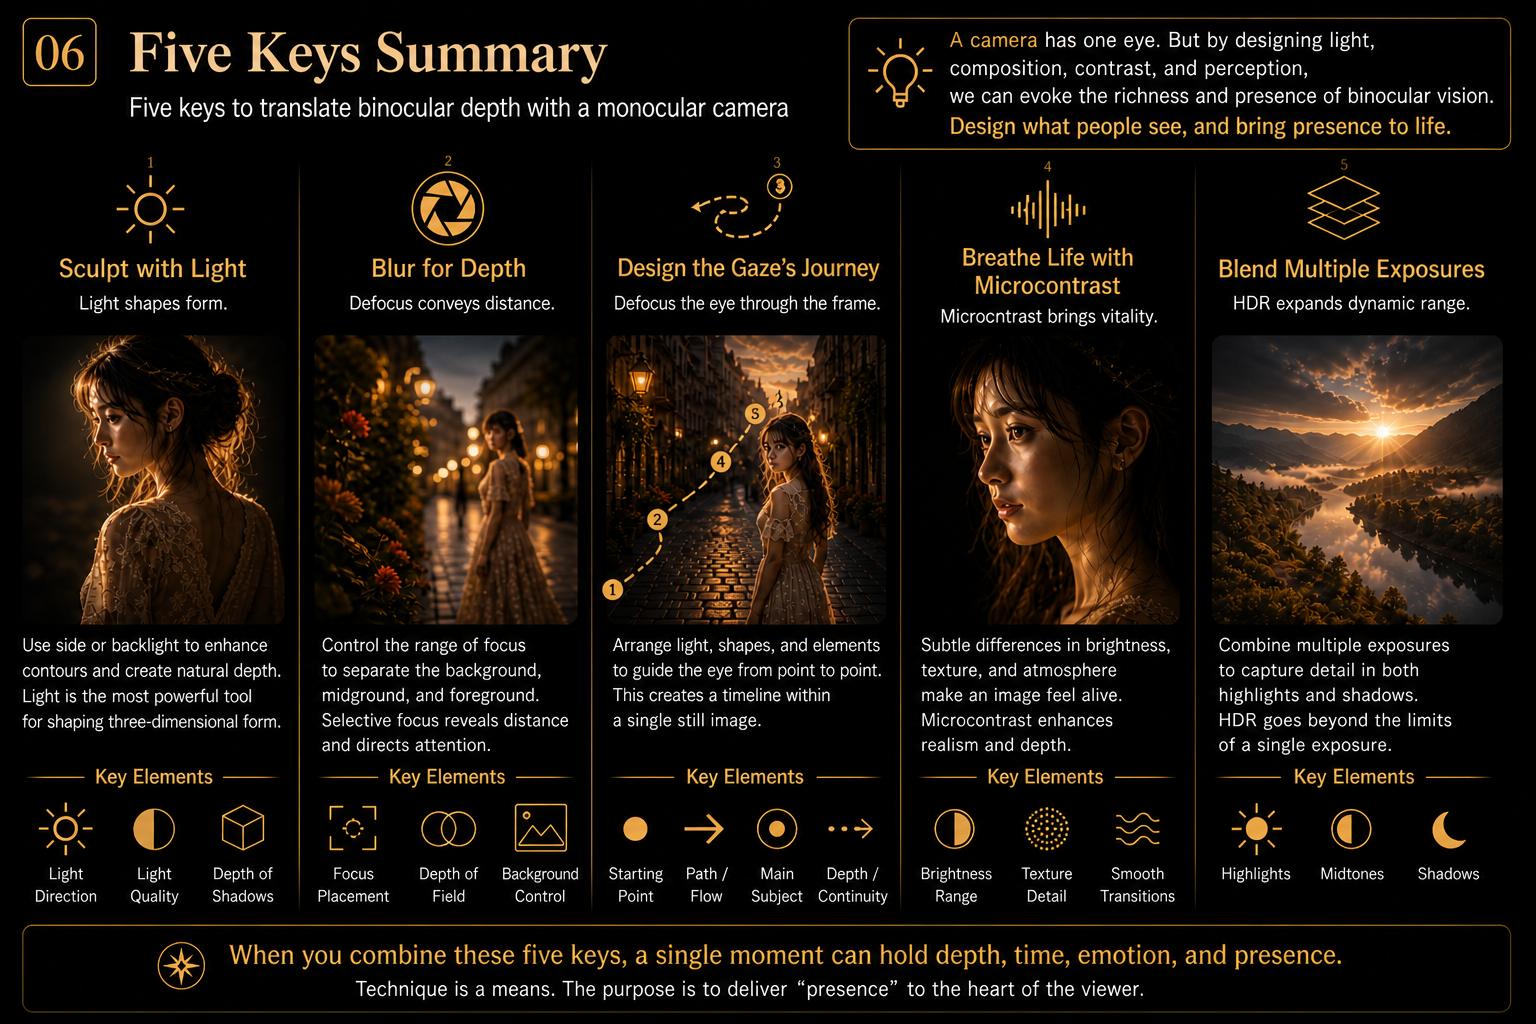
5. Five Keys to Simulating Binocular Perception with a Monocular Camera
- Sculpt with Light: Use directional light to create dimensional edges.
- Blur for Depth: Use depth of field to encode spatial distance.
- Design the Gaze’s Journey: Build a visual path through time and space.
- Breathe Life with Microcontrast: Subtly emphasize edges and textures through delicate post-processing.
- Blend Multiple Exposures: Simulate adaptive vision via gentle HDR, used carefully.
In Closing
“Photography” and “how we see” are not the same.
But by learning the nature of that gap, we may discover ways to make the difference itself a creative tool.
How do we translate that familiar, binocular feeling of presence using the single eye of a camera?
It may not simply be a technical challenge but rather, a philosophical question about the very nature of seeing.
Next time you press the shutter,
which task of the brain will you let the light perform?